Editing a page is easy, especially if you are familiar with word processing software.
WordPress’s WYSIWYG (What You See Is What You Get) editor is a visual text editor that lets you edit and format content and view changes in real-time without the need to know coding.
Remember that you need to be logged in to make changes to a page.
There are two ways to do this.
The first way is to go to the page you want to edit via the front-end (ie just as a visitor to your site would do).
As long as you are logged in, you will see a black bar along the top of the page. Click Edit Page.
The second way is via the dashboard:
Hover over Pages in the sidebar and click All Pages.
You will see a list of all the pages on your site in alphabetical order.
You can search through the list until you find the page you are looking for, or you can type the name of the page in the search box and click Search Pages.
When you find your page, hover over the name and click Edit.
The WYSISYG editor enables you to make changes without the need to know coding. You can add, delete and change content just as you would with (say) word processing.
The back-end of a page will look like the example below (a Beavers page).
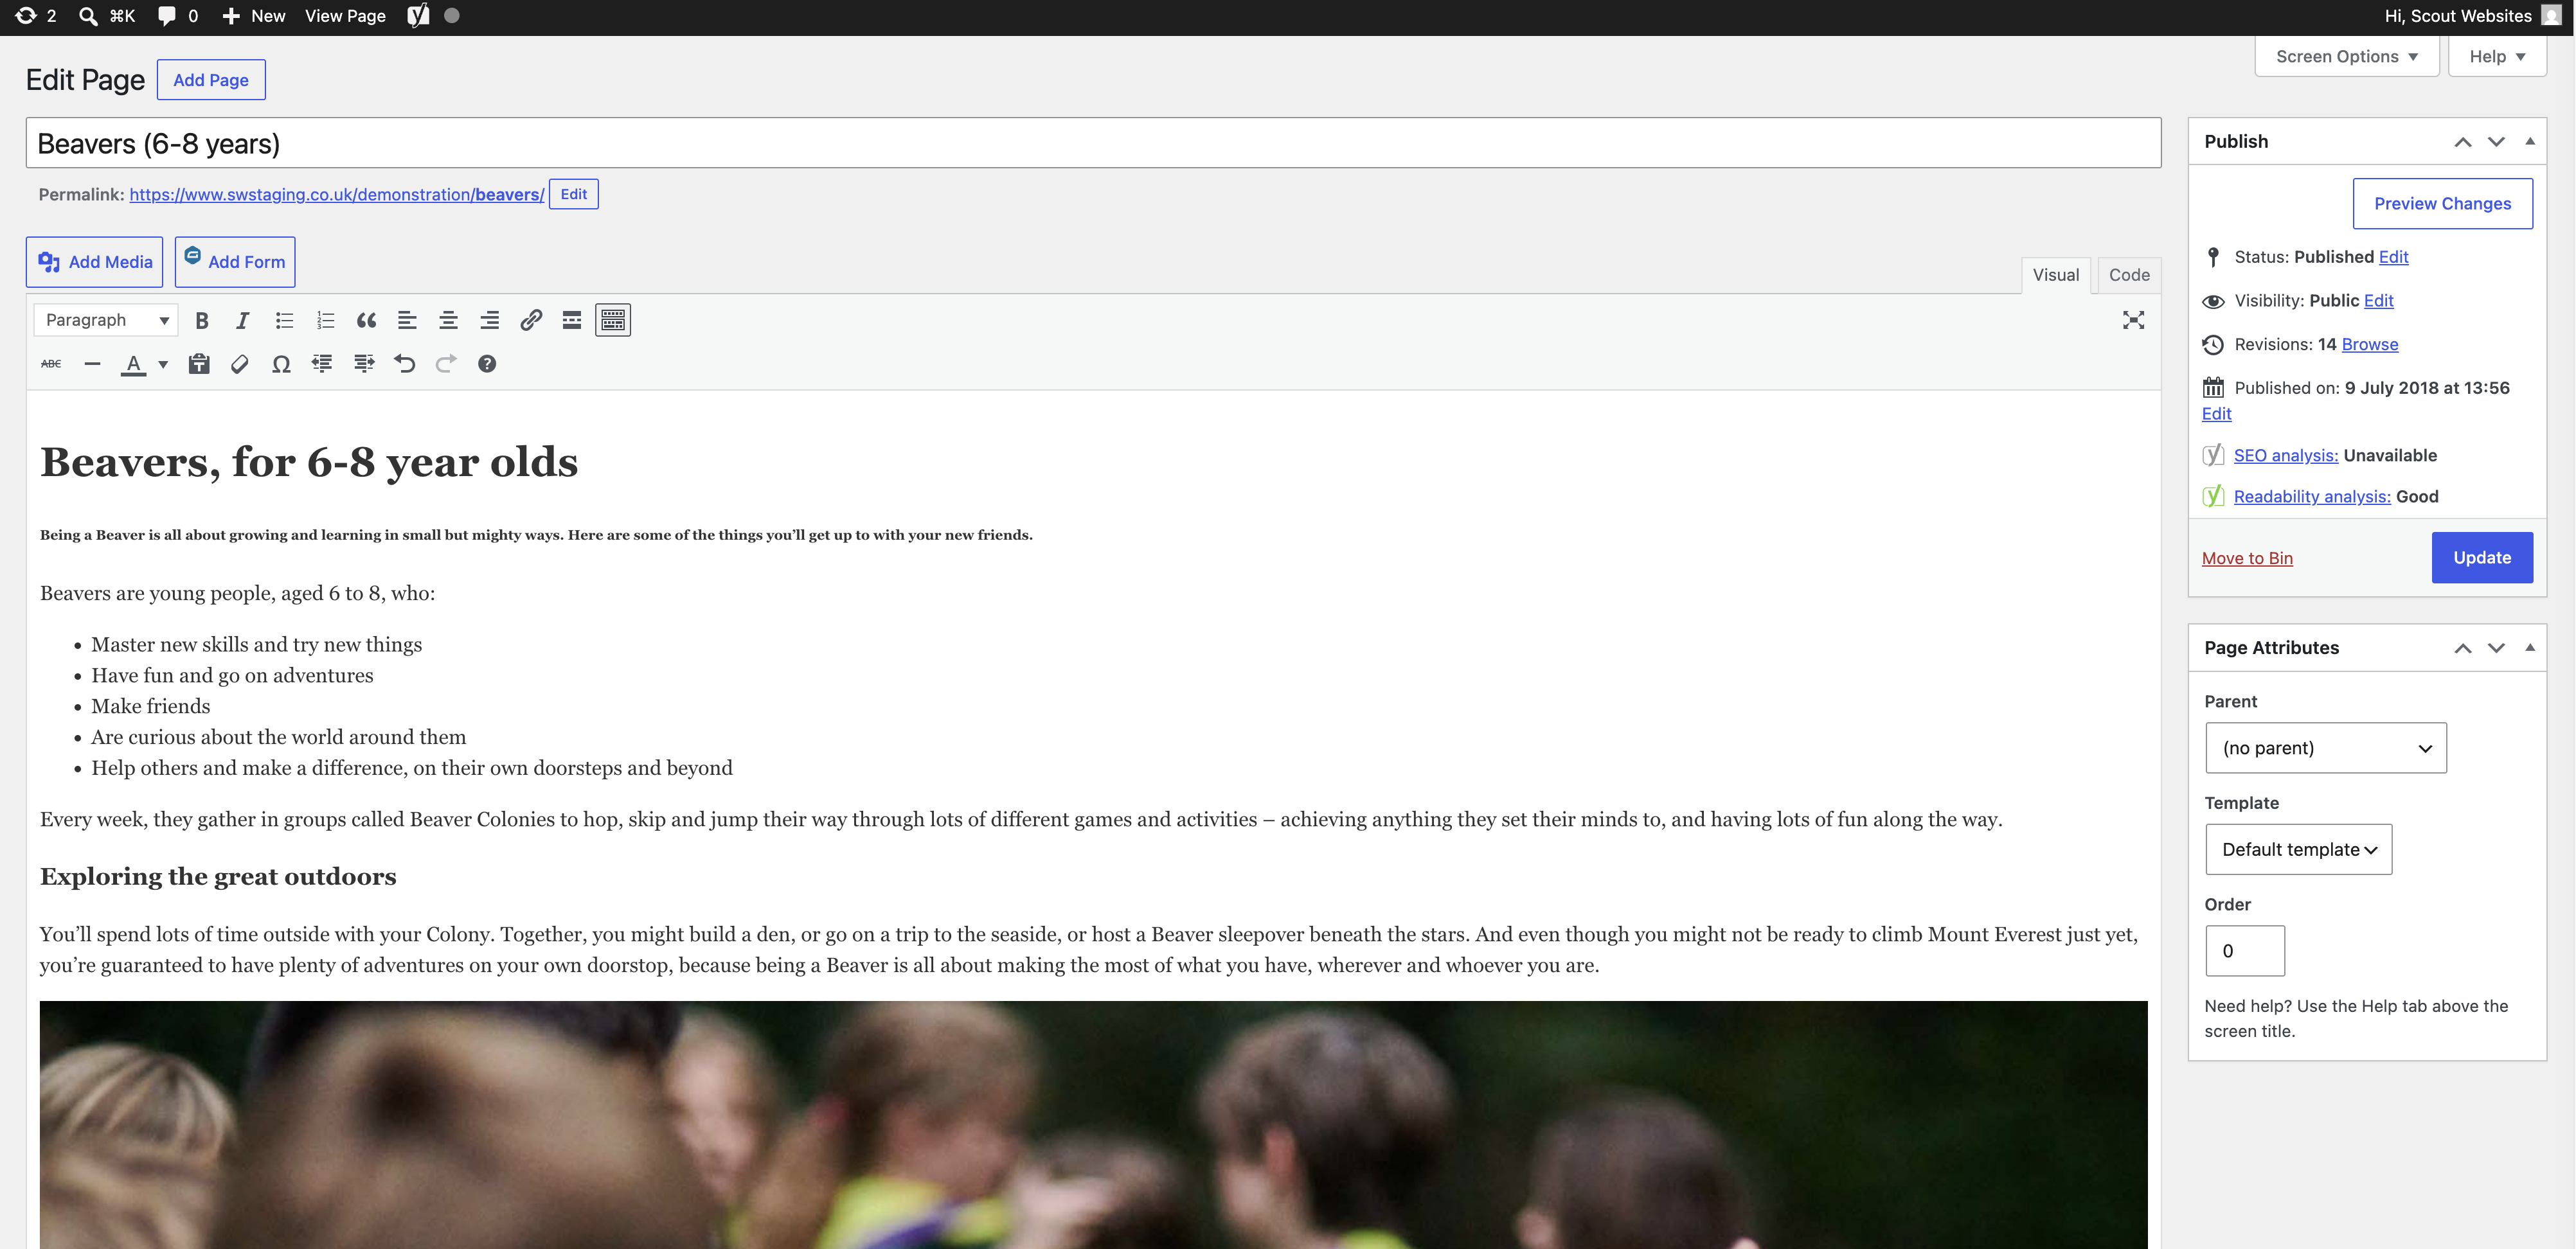
Notice the following:
You can toggle between visual text editor and code text editor. (Most beginners find visual text editor easier to work with for basic editing.)
A toolbar near the top, with various buttons that should look familiar from word processing software.
An Add Media button. This takes you to the Media Library where your photos are located.
A Publish sidebar on the right.
An Update button. You need to click this to save any changes you make.