It is easy to make changes to your menus. You can add items, delete items and move items around.
Log in and go to your dashboard.
Click on Appearance in the sidebar and then Menus.
Select the menu that you want to edit by choosing a menu from Select a menu to edit and clicking Select.
Remember to click Save Menu whenever you make changes to a menu.
Here’s how to add a page that you have created to a menu.
Let’s imagine that I have already created a page called Group History and I want to add it as a sub-item under the heading (or ‘parent’) About Us in the Main Menu. There is already one sub-item called Our Team.
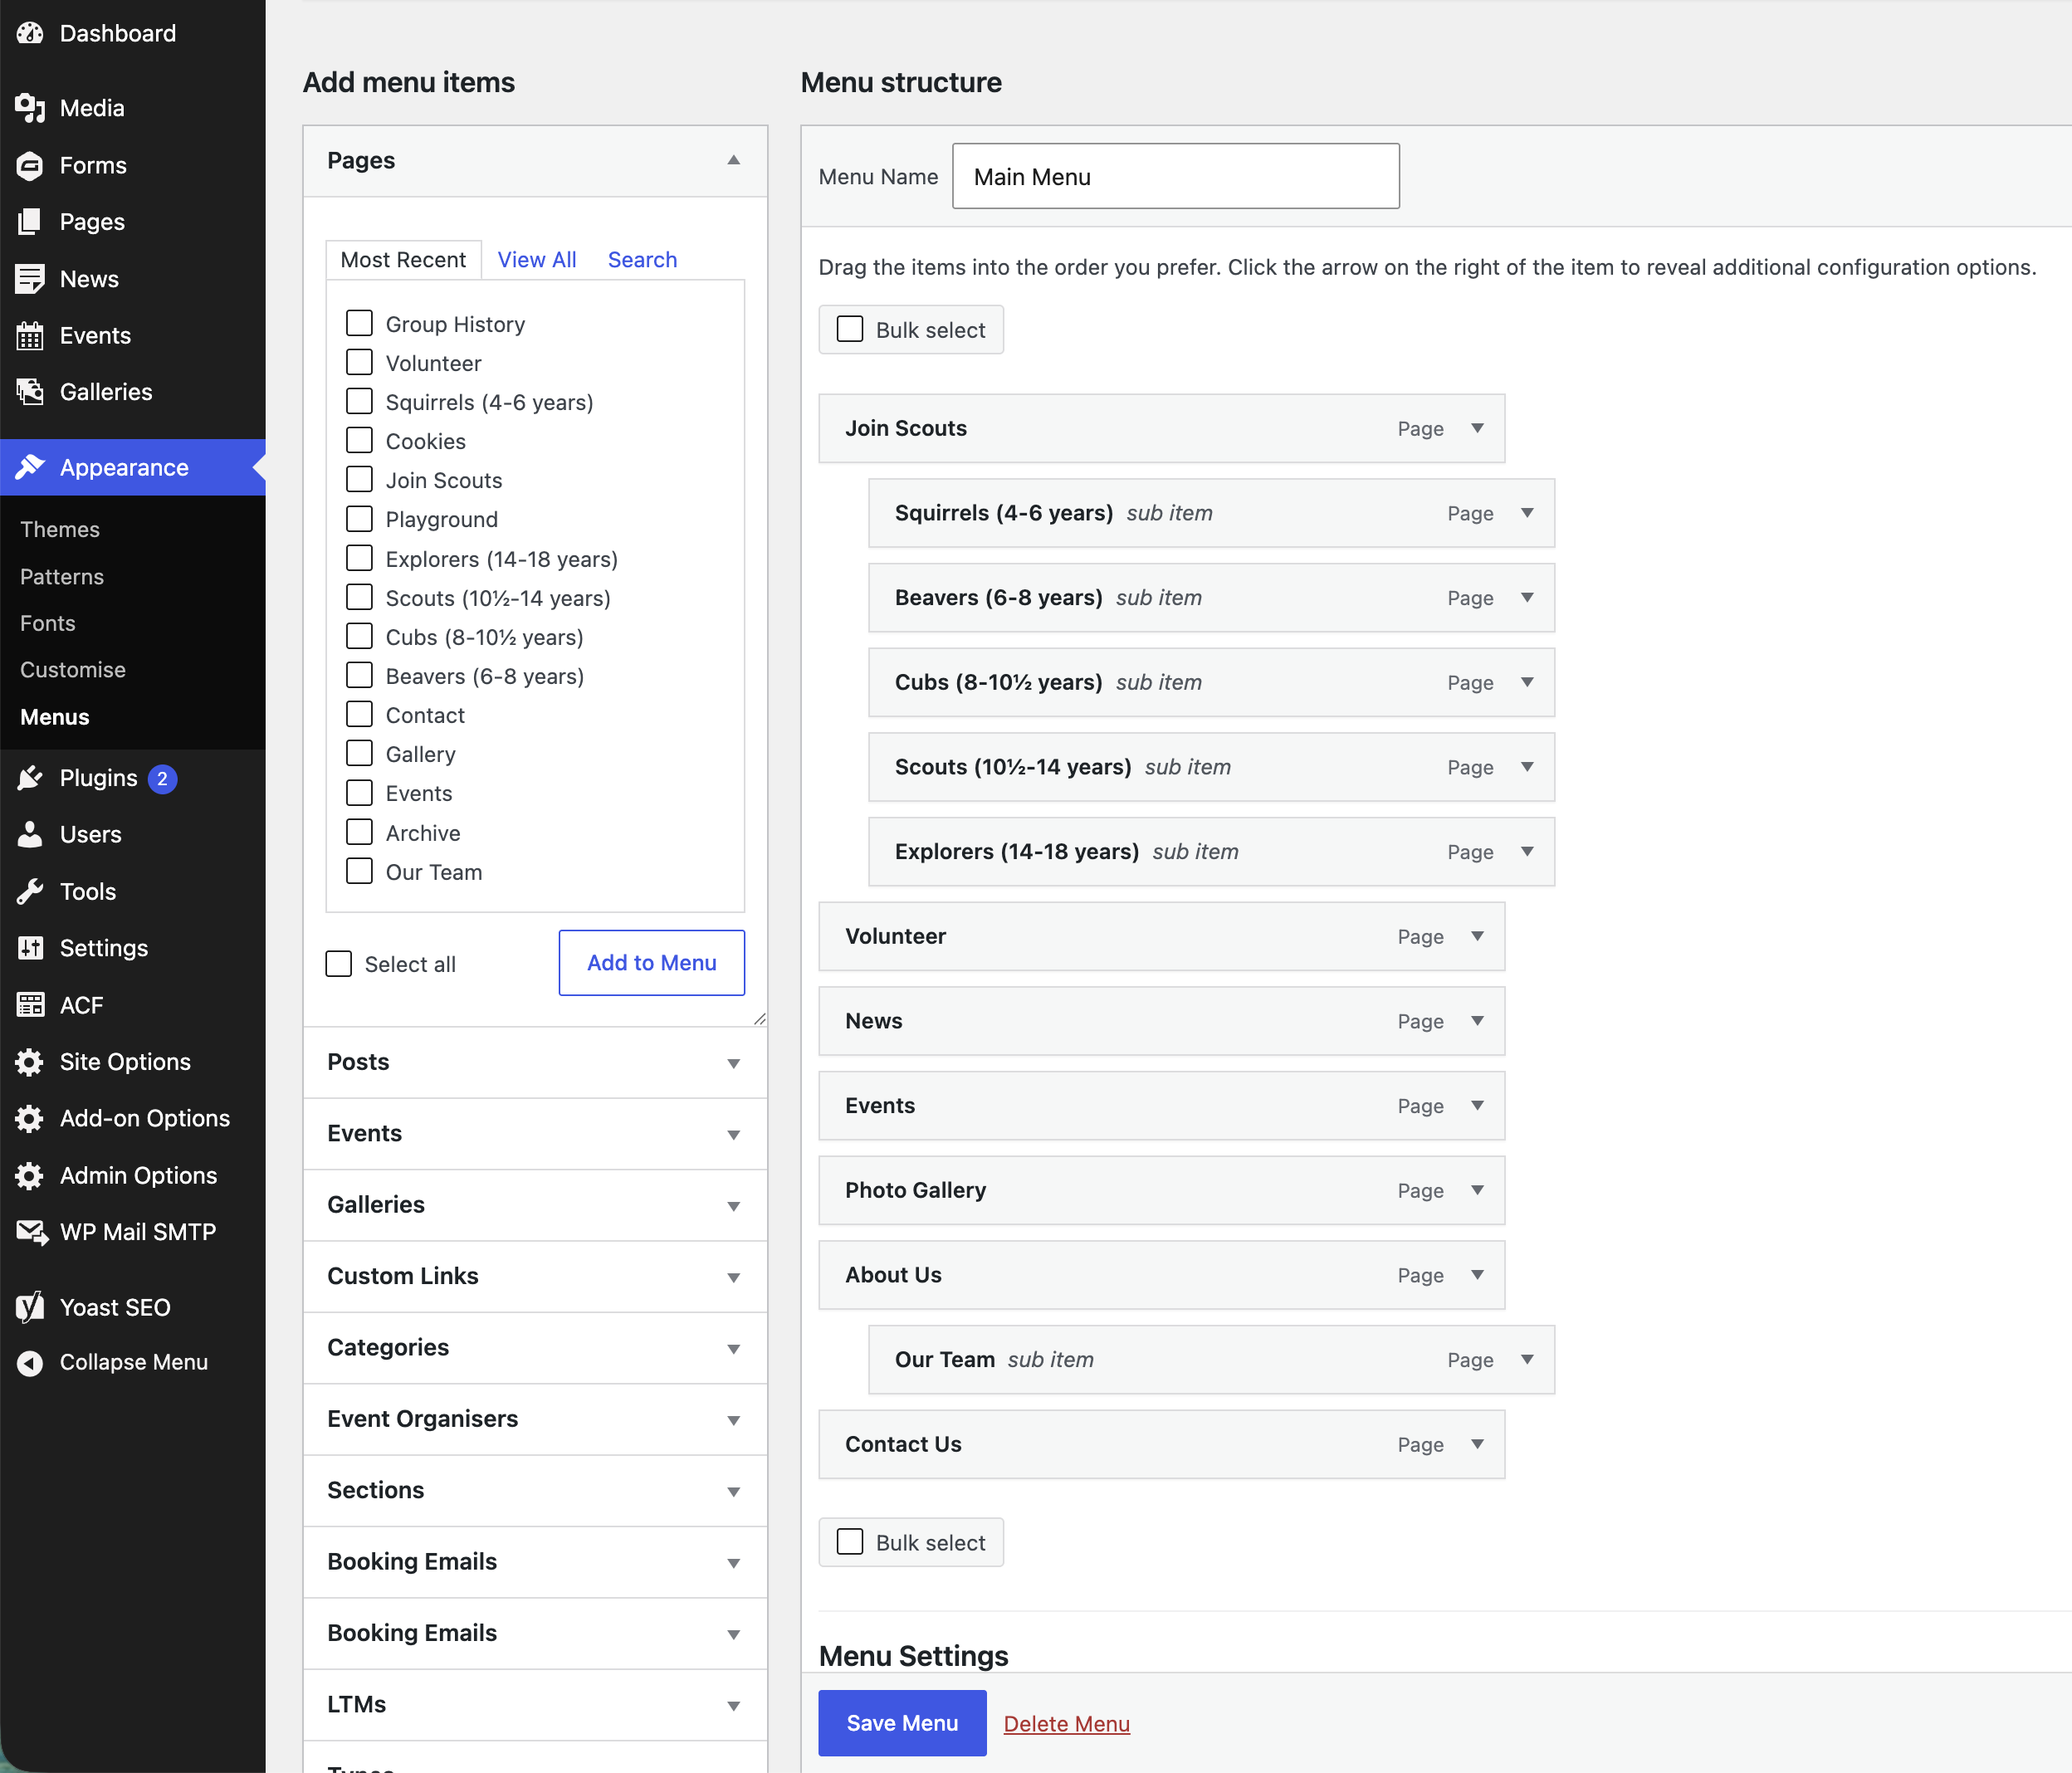
Notice in the image above that my new Group History page has automatically appeared in the Add menu items sidebar.
Tick the box next to Group History.
Click Add to Menu.
Group History will then appear at the bottom of the menu under the last item, Contact Us.
Simply drag and drop it to wherever in the menu you want it to appear.
Click Save Menu.
Let’s imagine that I have changed my mind and no longer want the Group History page in this menu. You will see in the image below that I had placed it underneath Our Team.
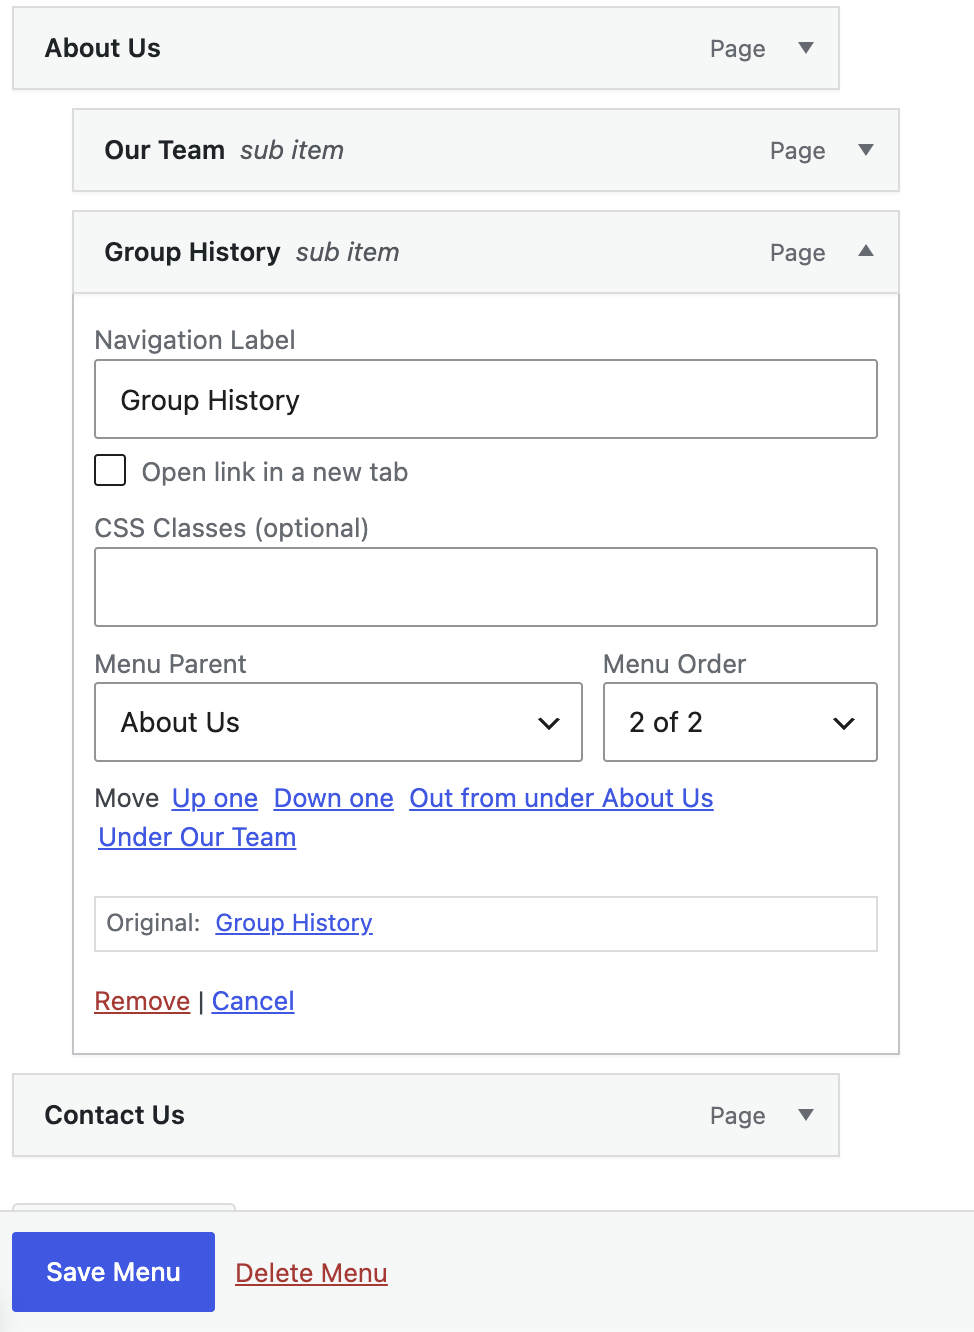
Click on the dropdown arrow for Group History on the right. You will see an information panel.
Click Remove.
Click Save Menu.
The easiest way to re-order your menu is simply to drag and drop items to where you want them to be.
Alternatively, you can do it by clicking the dropdown panel for an item and using the options in the information panel next to Move.
Notice that if you move an item around in your menu, the information in the panel will automatically update.
Remember to click Save Menu.