It is easy to create a simple form using Gravity Forms. Once you get the hang of it, you may want to create more complicated forms.
Note that there are also pre-built templates which you will see when you click Add New.
Click on Forms on your dashboard.
Click Add New.
Click New Blank Form.
Give your form a title.
Click Create Blank Form.
You then simply drag and drop the fields or elements you want in your form from the right-hand panel.
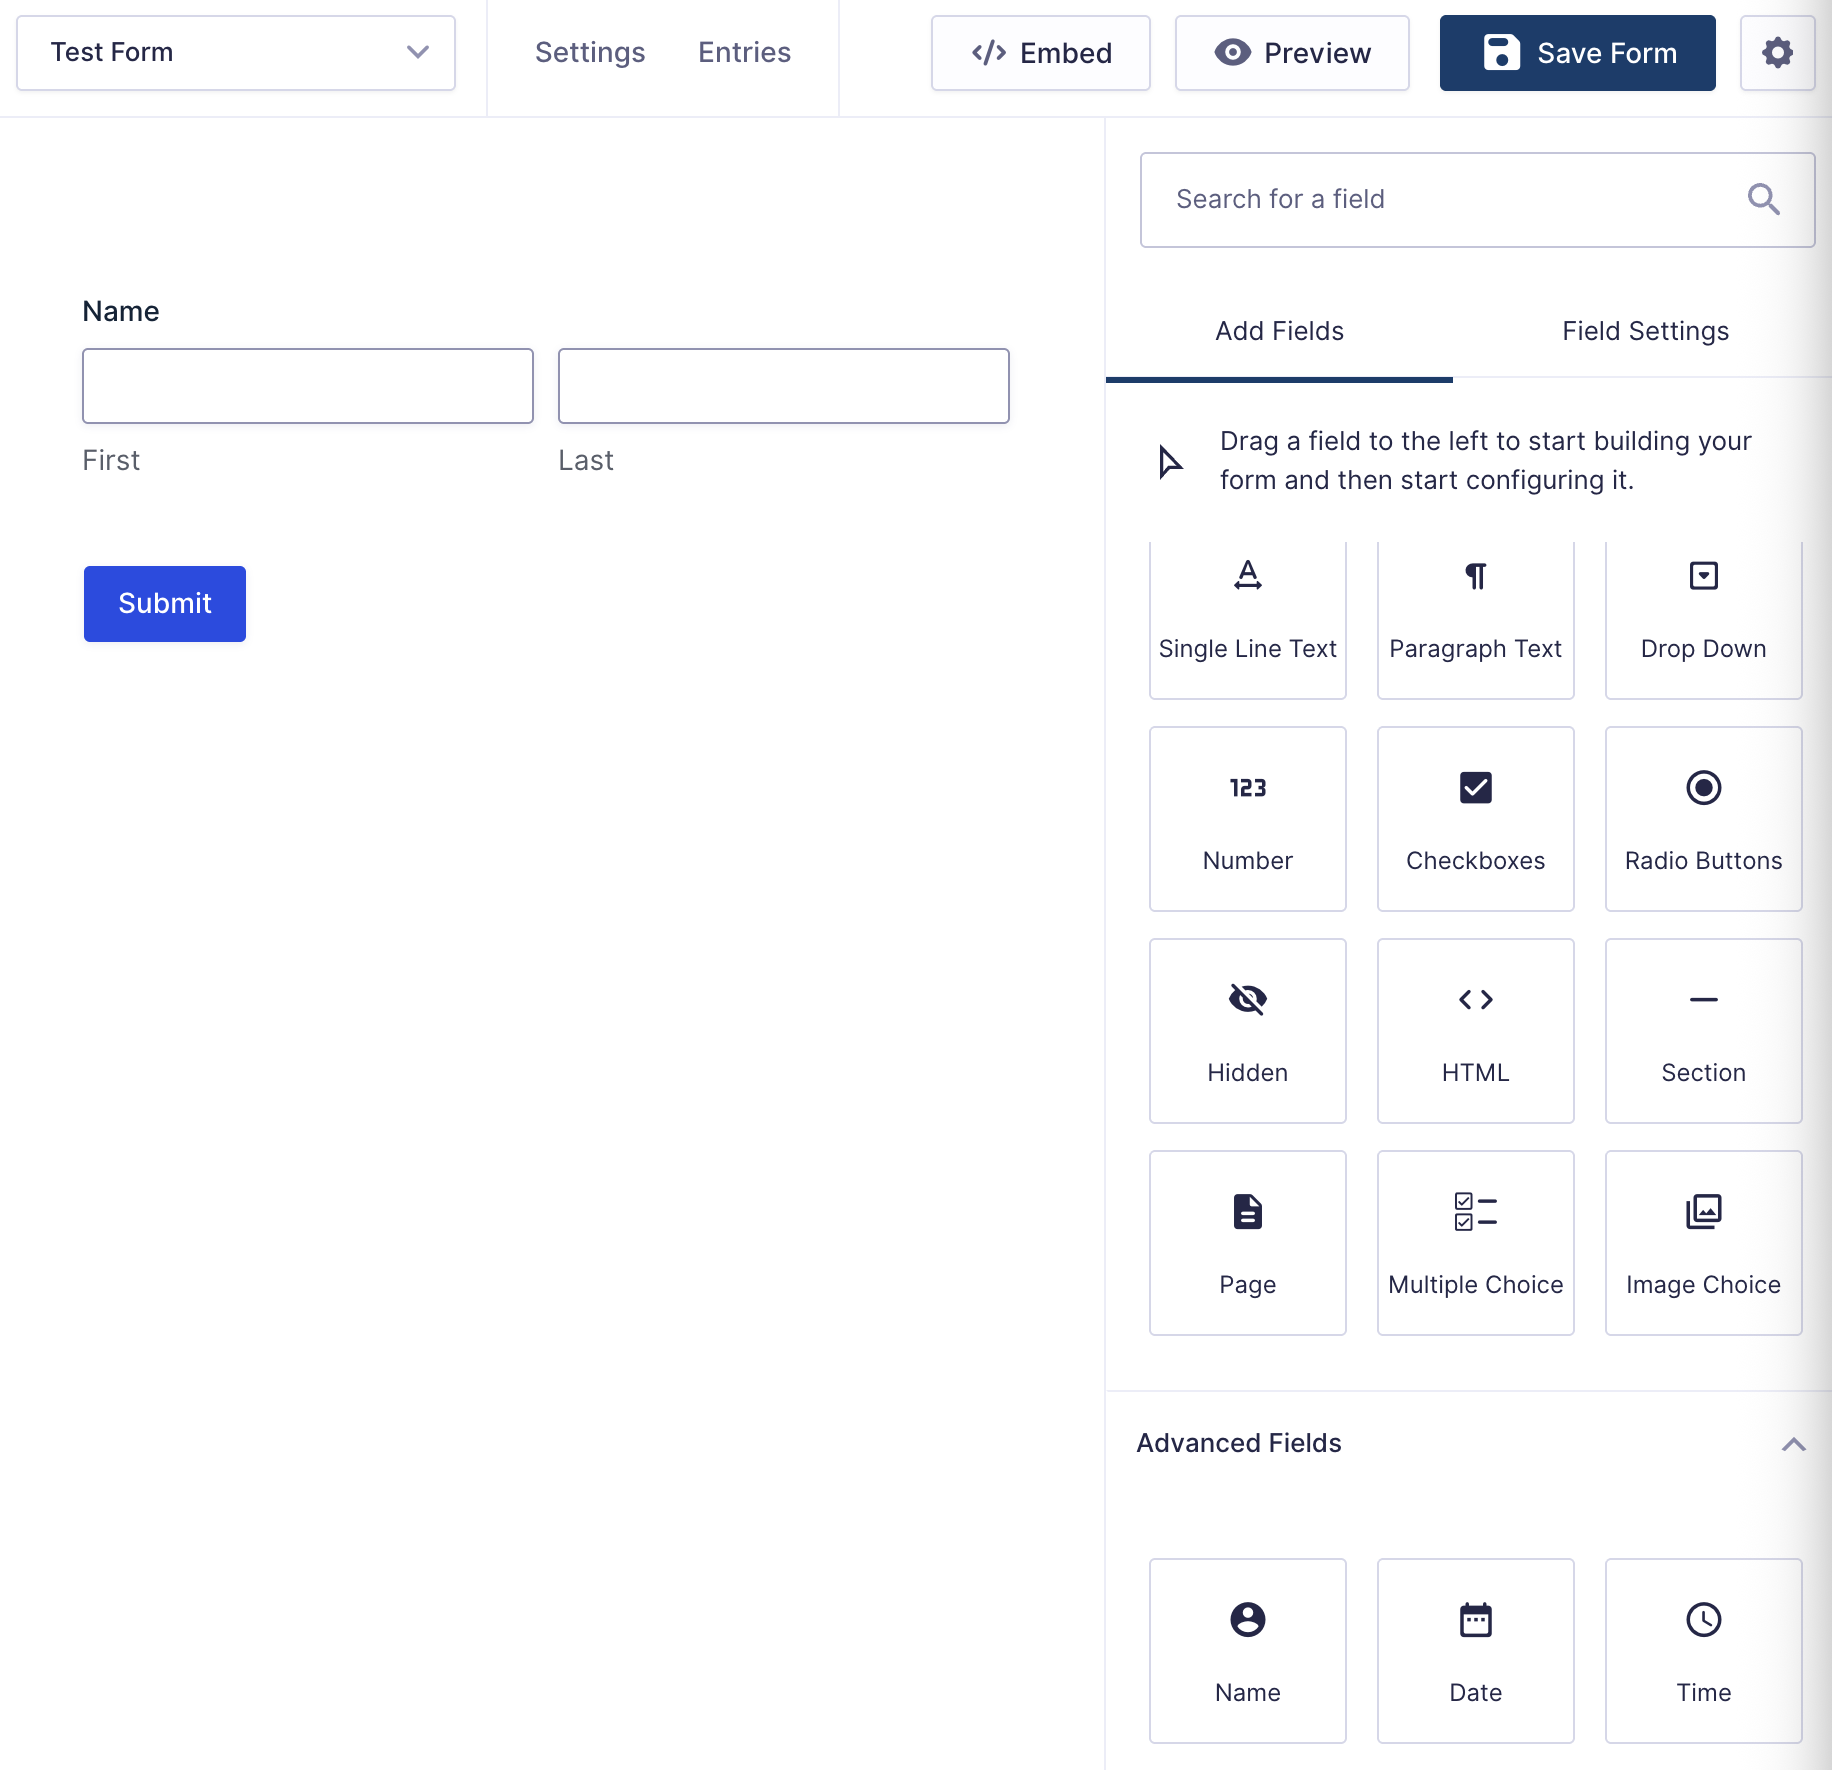
In the example above, I have added the Name field from the Add Fields panel on the right.
If you hover over this field in the main panel a black line appears. Click on it and this opens up Field Settings in the right-hand panel.
This allows you to add various settings. For example, if you check the Required button under Rules, it amends the Name field so that it becomes a field that the user must complete or the form won’t send.
Field Settings vary depending on the field.
For example, there is an option in the settings for the Email field saying Enable Email Confirmation.
This requires the user to enter their email address twice in case they have made a mistake.
Once you are happy with the form, click Save Form.
Go back to the main Forms table on the dashboard and you will find your new form added to the table with its own ID number.
You can duplicate – and then amend – an existing form rather than creating one from scratch.